In the world of automation, whether we’re talking about factory or shop automation, understanding how to operate and maintain FANUC CNC parts is imperative. Several businesses and companies suffer from dreaded downtime because a team isn’t well-rounded; many team members may know how to manage machine operators, etc., but are unaware of how to operate a CNC themselves. For a manager, knowing and understanding exactly what to look for to avoid an operating issue starts with understanding the basics of CNC machining and programming.
CNCs originally started coming about in the late 1940s, not long after World War II as NCs (Numerical Controls). They were engineered to be a reliable, cost-effective way to manufacture and design an increased amount of parts for the aircraft industry. Based on already-existing modified tools equipped with motors that manipulated the controls, CNCs were quickly and abruptly built up with computers, both digital and analog. As time has gone on, CNCs have continued to evolve as technology evolves.
Early Numerical Controls initially lacked computers. They also lacked calculating ability, which is absolutely unheard of in today’s world. After the 1960s, numerical controls eventually gained calculating and computer functions. Onboard processing became feasible and, as a result, CNC machines came about. Via the initiation of CNCs, a handful of features were then attainable, fortunately, including canned cycles, tool length compensation, sub programming, radial compensation and tool diameter.
Preparatory Codes
NC and CNC G Codes are referred to as preparatory codes. By preparing the machine to perform a specific function like, for example, rapid travel G0 / G00, the preparatory process is important to understand, as all of the stages of production are.
Miscellaneous Codes
NC / CNC M codes are known as miscellaneous codes. CNC M codes basically perform on and off functions such as:
- stopping processing of CNC code M0 / M00
- turning the spindle on M3 / M0 or M3 / M03
- stopping the spindle M5 / M05
- turning coolant on M8 / M08
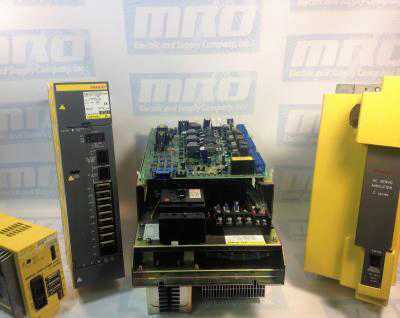
MRO Electric and Supply has new and refurbished FANUC CNC parts available. We also offer repair pricing. For more information, please call 800-691-8511 or email sales@mroelectric.com.
G Code and M Code
The ANSI standard for G code and M code programming is ANSI/EIA 274D-1988. The ISO standard for G code and M code programming is ISO 6983. There is a new and different standard ISO 14649 also known as the STEP-NC standard that addresses NC and CNC programming using the enhanced features of CAD and/or CAM software.
Machine tool builders are not required to adhere to standards and every so often create variations to standard G codes and M codes. Occasionally design different, unique alternatives to orthodox G codes and M codes. Typically, the majority of CNC G codes are considered modal, which means they stay active until they’re changed. Along with understanding CNC codes, feel free to view another one of our articles focused on choosing a CNC to become as well-versed with CNCs as possible.
Auxiliary Function (M Function)
When a numeral is specified following address M, code signal and a strobe signal are sent to the machine. The machine uses these signals to turn on or off its functions. Usually, only one M code can be specified in one block.
In some cases, however, up to three M codes can be specified for some types of machine tools. Which M code corresponds to which machine function is determined by the machine tool builder.
The machine processes all operations specified by M codes except those specified by M98, M99,M198 or called subprogram(Parameter No.6071 to 6079), or called custom macro (Parameter No.6080 to 6089). Refer to the machine tool builder’s instruction manual for details.
The following M codes have special meanings:
- M02, M03 (End of Program)
- This indicates the end of the main program Automatic operation is stopped and the CNC unit is reset.
- This differs with the machine tool builder. After a block specifying the end of the program is executed, control returns to the start of the program. Bit 5 of parameter 3404 (M02) or bit 4 of parameter 3404 (M30) can be used to disable M02, M30 from returning control to the start of the program.
- M00 (Program Stop)
- Automatic operation is stopped after a block containing M00 is executed. When the program is stopped, all existing modal information remains unchanged. The automatic operation can be restarted by actuating the cycle operation. This differs with the machine tool builder.
- M01 (Optional Stop)
- Similarly to M00, automatic operation is stopped after a block containing M01 is executed. This code is only effective when the Optional Stop switch on the machine operator’s panel has been pressed.
- M98 (Calling of Sub-Program)
- This code is used to call a subprogram. The code and strobe signals are not sent.
- M99 (End of Subprogram)
- This code indicates the end of a subprogram. M99 execution returns control to the main program. The code and strobe signals are not sent.
- M198 (Calling a Subprogram)
- This code is used to call a subprogram of a file in the external input/output function. See the description of the subprogram call function (III–4.7) for details.
Multiple M Commands in a Single Block
In general, only one M code can be specified in a block. However, up to three M codes can be specified at once in a block by setting bit 7 (M3B) of parameter No. 3404 to 1. Up to three M codes specified in a block are simultaneously output to the machine. This means that compared with the conventional method of a single M command in a single block, a shorter cycle time can be realized in machining.
CNC allows up to three M codes to be specified in one block. However, some M codes cannot be specified at the same time due to mechanical operation restrictions. For detailed information about the mechanical operation restrictions on simultaneous specification of multiple M codes in one block, refer to the manual of each machine tool builder. M00, M01, M02, M30, M98, M99, or M198 must not be specified together with another M code. Some M codes other than M00, M01, M02, M30, M98, M99, and M198 cannot be specified together with other M codes; each of those M codes must be specified in a single block.
Such M codes include these which direct the CNC to perform internal operations in addition to sending the M codes themselves to the machine. To be specified, such M codes are M codes for calling program numbers 9001 to 9009 and M codes for disabling advance reading (buffering) of subsequent blocks. Meanwhile, multiple of M codes that direct the CNC only to send the M codes themselves (without performing internal operations ) can be specified in a single block.
M Code Group Check Function
The M code group check function checks if a combination of multiple M codes (up to three M codes) contained in a block is correct.
This function has two purposes. One is to detect if any of the multiple M codes specified in a block include an M code that must be specified alone. The other purpose is to detect if any of the multiple M codes specified in a block include M codes that belong to the same group. In either of these cases, P/S alarm No. 5016 is issued. For details on group data setting, refer to the manual available from the machine tool builder.
- M Code Setting
- Up to 500 M codes can be specified. In general, M0 to M99 are always specified. M codes from M100 and up are optional.
- Group Numbers
- Group numbers can be set from 0 to 127. Note, however, that 0 and 1 have special meanings. Group number 0 represents M codes that need not be checked. Group number 1 represents M codes that must be specified alone.